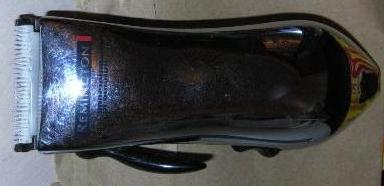
Remington HC-353 Recell.
By Brian Perrett, MW0GKX
I know that it's not a piece of radio equipment, but the general principles apply to a myriad of similar items… Also it shows that I don't just sit down in front of the PC all day every day writing pages for a website (ooer! I'm doing it again!).
WARNING: This fix requires soldering direct to batteries. To do the job safely you should use tagged cells, which are made for soldering!
I've had these cordless clippers since 2004, when they were purchased new with a set of attachments and other bits and pieces hair care related. The blade is ceramic and, allegedly, never needs sharpening so I thought I was set for life(ish). Over the past few months, however, I've noticed that even when fully charged the clippers were having a tough time as soon as they were under load. Time for new clippers? No! Around £25.00 for a replacement set of similar quality, whereas I've always got some rechargeable batteries hanging around. I decided to see if I could replace the internal cells and give the clippers a new lease of life.
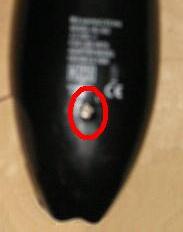
Firstly I examined the clippers to see how the case was secured. It turned out to be just one screw, but it was hidden behind a blanking plug (this is quite common on all sorts of equipment). The location is ringed in red on the picture on the right (plug removed).
To remove the blanking plug is easy but destructive (for the plug!). I used a small self tapping screw, which I screwed into the centre of the plug. After getting a couple of turns in I pulled the screw straight out, the plug came with it. The plug could be replaced after putting it all back together, but it now has a hole in it.
Once I'd got the blanking plug out there was an ordinary cross point headed screw in the hole, it was the work of seconds to remove it. The casing was then free at the handle end, it was still held at the sides toward the blade by clips moulded into the casing halves. These were popped out and the top, chrome coloured, case half came free.
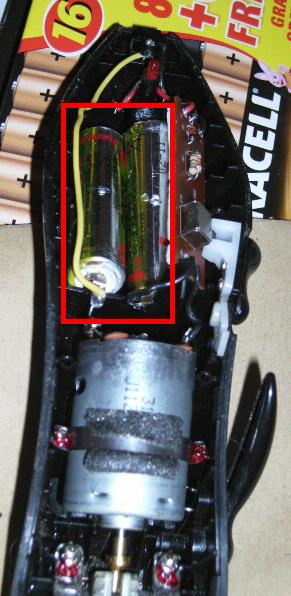
Inside was much as I expected, a motor, a small charging circuit, an on / off switch and, best of all, 2 AA sized rechargeable batteries.
I desoldered the batteries from the circuitry and got a pair of batteries that I had on the bench that were still in fine fettle. I prepped the pips and bases of the "new" batteries with a file (a good scratching always helps the solder take) and with a hot iron I tinned the ends of the batteries.
If you do this use as hot an iron as you can and be very quick with the heat on the battery. Leave the battery to cool between tinning or soldering each end.
Overheated batteries can explode!
I then soldered a jumper wire between the - of one battery and the + of the other. The difficult bit was fitting the new batteries into the space where the old ones were. The old ones were tagged cells and they don't have a pip for the + end, they are flat, thus a mm or 2 shorter.
A bit of pushing and easing later I'd got the batteries into position (shown in the red box, left). I then soldered the + and - connections to where they had been originally and switched on.
The motor span and the blade oscillated so all was well. I also tried the charger at this point as it's easier to remedy any problems before you fit everything back and close the case! The "charging" light lit and a slight voltage rise was measured at the battery terminals so that was fine too.
I dripped a couple of drops of light machine oil onto the motor bearings while the case was open. The motor was spinning well but, being 5 years old and having bronze type bushings, a drop or 2 of oil doesn't go amiss. The case was clipped back into place and the screw replaced. I didn't need to charge the batteries before use as they were charged and ready to go before I started the repair.
A visit to the bathroom later and I can report that the clippers no longer slow down under load. In fact they worked as well as they did when new. Success! A job well done.
The only differences I now have is that the original batteries were 600 mAh and took 16 hours to fully charge. The replacements are 2000 mAh (they will last longer per full charge!) and, by my calculations, will take around 50 hours to fully charge at the same rate (original charger). No problem, as I will give them an overnight charge after each use to keep them ready for next time, and the clippers are a couple of grammes heavier (the replacements were heavier, probably due to their lager capacity).
The best thing about this was the cost. I used batteries that I already had, they're a couple of years old but still good, if I get 1 year use from them, it's more than worth it (and I may be tempted to use new ones next time, we'll see!) - £0.00, a bit of solder and some spare wire, again no charge, as such.
What about the item I used the batteries in before I put them in the clippers? Well it's the cordless mouse on the PC and the current requirement is a lot less than the motor in the clippers. I split them to 2 single batteries (pulled off the spot welded link) and they are doing quite well in the mouse for now, allowing for their lower capacity!
If I'd purchased 2 tagged 2000 mAh batteries locally the cost would have been around £7.00 (for the pair, there are less expensive suppliers so shop around). Just over a quarter the price of replacement clippers that had nothing else wrong with them.
Many cordless items use standard sized rechargeable cells and, if the item is working but the performance is down due to lack of power, a re-celling could give it a whole new lease of life. After all you wouldn't get rid of your car just because the battery needed replacing would you?